CacheGuard-OS
User's Guide - Version UF-2.0.2
Network Security
The security issue is one of the major occupations of the appliance. The appliance distinguishes between two types of network traffic: network traffic destined to the appliance itself (Web traffic) and network traffic destined to third parties across the appliance externally.
Accessing the appliance itself or objects accessed by the appliance may all be controlled and configured according to your needs and security policies. The command "access" allows you to control the traffic.
The appliance integrates a stateful IP firewall that controls all other network traffic not destined to the appliance itself. The command "firewall" allows you to control these types of traffic.
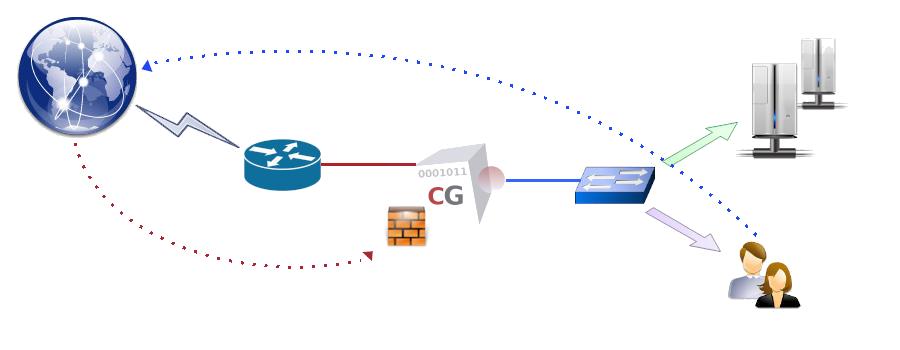
Administration Access
For security reasons the appliance administration is only granted to trusted administrators, so administrators must be authenticated before they can access the administration interfaces (with login/password). Moreover remote administrators should be declared as trusted before being allowed to access the administration interfaces. A remote trusted administrator is identified by its IP address. The same restriction is applied for file servers exchanging files with the appliance. To allow remote administrators having the IP address "172.18.2.1" to administrate the appliance, use the following commands:
- access admin add internal 172.18.2.1
- apply
To trust the file server accessible with the IP address "172.18.2.1" in your networks, use the following commands:
- access file add internal 172.18.2.1
- apply
Note that supported protocols are FTP and TFP. When using the FTP, if the FTP server requires authentication, a login and password may also be specified with the command "access file". To set the login and password information, give the login name after the IP address and then press return to be prompted to enter the password securely. The FTP password can also be set with the command "password".
Web Users Access
By default all internal Web users are allowed to connect to the internet by using the appliance as an internet gateway and a Web proxy. This access may be restricted to predefined subnets only, if desired. To activate this feature at least one Web user access rule should be defined. Note that when previous peers (see the command "peer") are defined, this feature is implicitly activated.
To allow only Web users located on the subnets "172.18.2.0 / 255.255.255.0" and "10.26.0.0 / 255.255.0.0" to access the internet, use the following commands:
- access web raz
- access web add internal 172.18.2.0 255.255.255.0
- access web add internal 10.26.0.0 255.255.0.0
- apply
Web Servers Access
By default the appliance is allowed to access all backend Web servers. This access may be restricted to predefined subnets only. To activate this feature at least one Web server access rule should be defined.
To allow only Web servers located on the subnet "172.18.3.0 / 255.255.255.240" to be accessed by the appliance, use the following commands:
- access rweb raz
- access rweb add 172.18.3.0 255.255.255.240
- apply
The Firewall
The appliance may filter other network traffic than Web traffic as soon as firewall mode is activated and the appliance acts as a router. This way, all incoming network traffic from the external area (internet) destined to the internal area and all outgoing network traffic from the internal area (local Web users and Web servers) destined to the external area may be controlled by the appliance. The internal firewall (command "firewall internal") manages outgoing network traffic while the external firewall (command "firewall external") manages incoming network traffic.

The "firewall" command allows you to configure the integrated firewall. If no rules are specified, all outgoing traffic initiated from the internal area and destined to the external area are allowed while all incoming traffic from the external area and destined to the internal area are denied. If at least one rule is added to the internal firewall then only specified network traffic will be allowed. To allow an incoming network traffic from the external area destined to the internal area, you have just to add the related rule to the external firewall.
In addition, when the firewall feature is activated, the appliance blocks common network attacks like syn-flood attacks, ping-of-death attacks, brute-force attacks, smurf attacks and much more.
Also the firewall module provides NAT (Network Address Translation) and PAT (Port Address Translation) mechanisms to translate network address and port numbers.
To understand better the firewall mechanism see the following example: to allow a workstation identified by the IP address "172.18.2.5" and located in the internal area to access peer-to-peer applications located in the external area which use the TCP ports 7510:7529, to connect to that workstation, use the following commands:
- ip external 192.168.1.254 255.255.255.0
- mode firewall on
- mode router on
- mode snat off
- firewall web add r1 allow tcp 172.18.2.5 external
- firewall external add r1 allow tcp any web 192.168.1.254 7510:7529 172.18.2.5
- apply
Please note that firewall rules are applied before source NAT but after destination NAT and PAT..
IPsec VPNs
VPN stands for Virtual Private Network and IPsec for Internet Protocol Security. An IPsec VPN allows you to authenticate and encrypt the packets of data between 2 networks over an IP network to provide secure encrypted communications. You can build a persistent VPN IPsec between 2 sites and/or allows remote workers to access your internal infrastructures via a VPN IPsec server. To activate the IPsec VPN server on the present system see the command "mode". Then the "vpnipsecl" command can be used to create and manage IPsec VPNs.
We distinguish two types of IPsec VPNs: site to site VPNs and remote access VPNs. A site to site (or inter site) VPN allows you to build a permanent secure tunnel between two sites. With such a tunnel, computers in both sites can communicate with each other in a secure way as they were on the same location whereas in reality they can be separated by several thousands of kilo meters and connected via the internet. To build a site to site IPsec VPN tunnel you need two VPN servers: a local VPN server and the remote (or peer) VPN server.
A remote access VPN is a central VPN server to which a remote worker can connect via a secure tunnel build on top of the internet. With such a tunnel a remote worker can access the computers protected by the VPN servers in a secure way as eh/she was on the same locations as those computers location.
To build a remote access IPsec VPN you need a central IPsec VPN server while each remote worker connect the central VPN server using an IPsec VPN client. This system supports native IPsec VPN client software provided by most devices and OS in the market. In case where a remote worker can't be connected using its native IPsec VPN client software the alternative is to install a third party IPsec VPN client on his/her device. The \fBvpnipsec\fR command allows you to build site to site as well as remote access IPsec VPNs.
To build a site to site IPsec VPN between the Paris and London sites represented on the diagram below use the following commands on the CacheGuard located in Paris:
- ip external 192.168.155.254 255.255.255.0
- ip internal 10.0.10.254 255.255.255.0
- mode vpnipsec on
- vpnipsec access off
- vpnipsec authenticate psk very-strong-and-long-psk-2connect-2paris
- vpnipsec site add London 192.168.155.253 psk very-strong-and-long-psk-2connect-2london
- vpnipsec network site London raz
- vpnipsec network site London add local 10.0.10.0 255.255.255.0
- vpnipsec network site London add remote 10.0.11.0 255.255.255.0
- apply
Configure the CacheGuard in London as follows:
- ip external 192.168.155.253 255.255.255.0
- ip internal 10.0.11.254 255.255.255.0
- mode vpnipsec on
- vpnipsec access off
- vpnipsec authenticate psk very-strong-and-long-psk-2connect-2london
- vpnipsec site add Paris 192.168.155.254 psk very-strong-and-long-psk-2connect-2paris
- vpnipsec network site Paris raz
- vpnipsec network site Paris add local 10.0.11.0 255.255.255.0
- vpnipsec network site Paris add remote 10.0.10.0 255.255.255.0
- apply

With this configurations computers located in the 10.0.10.0/24 network located in Paris can securely communicate with computers in the 10.0.11.0/24 network located in London.
To build a remote access VPN server on the CacheGuard use the following commands:
- ip external 192.168.155.2.254 255.255.255.0
- ip internal 10.0.12.254 255.255.255.0
- mode vpnipsec on
- vpnipsec access on
- vpnipsec authenticate psk veryStrong@ndLongpPSK2connec2NY
- vpnipsec network access raz
- vpnipsec network access add local 10.0.12.0 255.255.255.0
- vpnipsec network access add remote 172.17.0.0 255.255.0.0
- apply
With this configurations remote workers connect to the IPsec VPN server at the IP address 192.168.155.2.254 using an IPsec VPN client. After being connected they get a virtual IP address in the network 172.17.0.0/16 and can securely communicate with computers located in the network 10.0.12.0/24 located in New York.
Authentication
Authentication is used to restrict the Web (or rWeb) usage to authenticated users only. The current appliance version supports LDAP and Kerberos authentication modes. The command "authenticate" allows you to configure the authentication mode. To authenticate users, the authentication mode should be activated using the command "mode".
For instance consider the following commands:
- mode authenticate on
- authenticate mode ldap on
- authenticate ldap request 'ou=people,dc=example,dc=com' 'uid' 'userPassword' 'objectClass=inetOrgPerson'
- authenticate ldap server add ldaps ldap.example.com 10.0.10.1
- authenticate ldap binddn 'cn=admin,dc=example,dc=com' on
- apply
The first command is used to activate the authentication mode. The second command specifies that authentication is required for users of the class "inetOrgPerson", registered under the object
ou=people,dc=example,dc=com, identified by the LDAP attributes "uid" and for which a password is stored in the LDAP attribute "userPassword".
The third command allows you to specify an LDAP server that supports SSL/TLS encryption, having the IP address "10.0.10.1" and named "ldap.example.com". Finally the fourth and fifth commands allow you to specify a bind DN (Distinguish Name) and password to access the LDAP tree.
An empty value ('') may be used for <passwd-attr> and <ldap-filter>. If an empty value ('') is specified for <passwd-attr> the LDAP binding is used during the basic authentication phase instead of comparing the entered password to <passwd-attr> (this is the preferred method used by Microsoft AD (Active Directory)™.
Sample Consfiguration for AD™
Create a user specifically for the LDAP binding In your AD™ with the user name let's say webgateway. Make suer that this user is not disabled and its associated password never expires. Then use the following commands to configure the authentication:
- mode authenticate on
- authenticate mode ldap on
- authenticate ldap request 'dc=example,dc=com' 'sAMAccountName'
- authenticate ldap server add ldaps ldap.example.com 10.0.10.1
- authenticate ldap binddn 'cn=webgateway,cn=users,dc=example,dc=com' on
- apply
AD™ has the capability to authenticate users using the Kerberos protocol. For instance consider the following commands:
- mode authenticate on
- authenticate mode kerberos on
- authenticate kerberos web proxy
- domainname example.com
- authenticate kerberos server raz
- authenticate kerberos server add dc.example.com
- authenticate kerberos encrypt aes
- authenticate ad rdn 'cn=computers'
- apply
The first and second commands are used to activate the Kerberos authentication mode. The second and third commands are used to set the Kerberos service name and domain name. Those names are used to create the appropriate object in the AD™ LDAP directory. The fifth and sixth commands are used to set the AD™ domain controller. Please note that more than one domain controller can be specified. The seventh command is used to set the encryption type used by AD™. If your AD is running on a Windows™ server 2003 you should use the
des type. For Windows™ server 2008 and above the
aes type should be used. Finally the eighth command is used to set the relative DN (Distinguish Name) of the object representing the
proxy.example.com in the AD™ LDAP directory tree. In this example the FDN (Full Distinguish Name) will be:
cn=proxy,cn=computers,dc=example,dc=com.
IMPORTANT NOTICE: The first time the Kerberos authentication mode is activated (after the
apply operation), the Kerberos authentication should be initialized. During the initialization process if the the LDAP object representing your system (
proxy.example.com in the example above) in AD™ does not yet exist, an object representing it is created in AD™. Also the initialization process allows your system to obtain a Kerberos ticket. To initialize the Kerberos authentication use the following commands:
- authenticate kerberos create administrator
- authenticate kerberos report
To this end, it is necessary to use an AD™ account with administrator permissions (user
administrator for instance). The first command requires that you interactively enter the password associated to the used administrator account. The given password here is not permanently saved and is removed after having obtained a Kerberos ticket. Please note that the Kerberos initialization is an asynchronous operation and is executed in background. The
report keyword allows you to display a report of the last Kerberos initialization operation.
Password Management
Administrator users are authenticated with a login and password to access the appliance. There are three types of passwords:
- The console password (For SSH and the console port)
- The Web administration GUI password
- The Web auditing GUI password
To set the console password use the following command:
Note that the console password modification takes effect after invoking the command "apply".
To set the Web administration GUI password use the following command:
To set the Web auditing GUI password use the following command:
If accessing authentication information in LDAP servers requires a password, the command "password" is there to set this password. To set the access password for the top LDAP object identified by the distinguished name "cn=admin,dc=example,dc=com", use the following command:
- password ldap 'cn=admin,dc=example,dc=com'
Copyright (C) 2009-2023 CacheGuard - All rights reserved