 CacheGuard-OS
User's Guide - Version UF-2.5.2
Using a Manager
If you deploy several CacheGuard Gateways in your organisation, you have the option to configure them separately, one by one. However, in most cases, Gateways deployed within the same organisation share similar configurations, requiring you to repeat the same configuration process for each device. A CacheGuard Manager system enables you to centrally configure and manage multiple remote Gateways from a single point. With a Manager, you can create configuration templates and build Gateway configurations based on those templates. These configurations can then be pushed in parallel to several Gateways with just a few commands or clicks.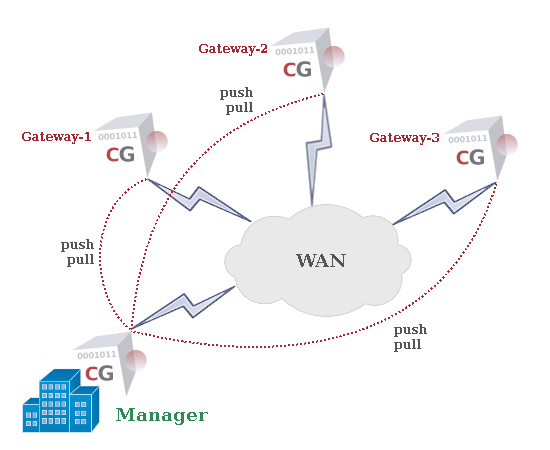
Gateway Access
Before being able to manage Gateways from a Manager, the Gateways must permit management access from that Manager. The Manager uses the SSH protocol and SSH keys to connect to Gateways. Therefore, Gateways must allow the Manager’s IP address SSH access and authorise the Manager’s SSH public key (so that a password is not required for each SSH session). A Gateway can be managed by one master Manager and, optionally, by a backup Manager. The backup Manager always maintains a hot copy of all Gateway configurations stored on the master Manager and can be activated in the event of a failure on the master Manager.A Manager system has only one logical network interface, called internal. To obtain the Manager’s IP address and its SSH public key, use the following commands on the Manager:
- ip internal
- manager ssh show
- manager add master external 192.168.1.22 'ssh-rsa AAAAB3Nza...'
- apply
Gateway Enrolment
Once a Manager is authorised to access a Gateway, the first step is to enrol that Gateway on the Manager and, optionally, pull its current configuration to store it on the Manager. Gateway configurations on the Manager are identified by unique identifiers that must be defined during enrolment. In addition, Gateways are organised into groups known as domains, and each Gateway must belong to exactly one domain. This enables you to push or pull configurations in parallel across all Gateways within the same domain.To enrol and pull the configuration of a Gateway with the IP address 10.0.10.254, use the following commands on the Manager:
- manager gateway add my-company gateway-1 10.0.10.254
- manager gateway pull my-company gateway-1
- manager gateway report pull
Gateway Configuration
Gateway configurations can be modified on the Manager and then pushed to remote Gateways. To begin editing a Gateway configuration on the Manager, use the following command:- manager gateway begin conf gateway-1
- manager gateway push my-company gateway-1
- manager gateway report push
Working with Templates
The main strength of the Manager lies in its ability to work with templates. A template is a special Gateway configuration that can be applied to multiple Gateways. This allows you to quickly configure several Gateways with similar configurations, customising only the elements that differ between them (such as IP addresses). To create a template named my-template on a Manager system and begin configuring it, use the following commands:- manager template add my-template
- manager template begin conf my-template
Now that you have created a template, you can apply it to a Gateway configuration. To do this, you must be within a Gateway configuration context. To configure a managed Gateway using a template named my-template, use the following command:
- conf manager template my-template
Master & Slave Managers
To ensure high availability and service continuity, a slave Manager can be configured to maintain a hot copy of all data stored on the master Manager. In this way, if the master Manager fails, the slave Manager can be activated to continue managing the Gateways. To enable communication between the master and slave Managers, both must know each other’s IP address. Additionally, the slave Manager must be aware of the master Manager’s SSH public key to allow SSH connections. Assuming the master Manager has the IP address 192.168.1.22 and the slave Manager has 192.168.1.33, use the following commands on the master Manager:- manager sync role master
- manager sync peer 192.168.1.33
- apply
- manager sync role slave
- manager sync peer 192.168.1.22 'ssh-rsa AAAAB3Nza...'
- apply